Creating a mirror wall can transform any space, adding depth, light, and a touch of elegance. Whether you’re looking to make a small room feel larger or add a decorative feature to your home, knowing how to make a mirror wall is essential. This comprehensive guide will walk you through each step, from planning and selecting the right mirrors to installation and finishing touches. Discover the benefits of a mirror wall and how it can enhance your interior design. With clear instructions and helpful tips, you’ll learn how to make a mirror wall that not only meets your aesthetic goals but also ranks well on Google. Read on to start your mirror wall project with confidence and creativity.
Planning and Designing Your Mirror Wall

Planning and designing your mirror wall is crucial for achieving a stunning result. Start by assessing the space and determining the best location for your mirror partition. Consider areas that will benefit from added light and depth. Next, decide on the style and layout of the reflectors. Whether you prefer a symmetrical design or a more eclectic arrangement, ensure it complements your room’s decor. Accurately measure both the wall and the mirrors to avoid any fitting issues. Proper measurements will help you plan the exact number of reflectors needed and their placement. By carefully planning and designing your mirror partition, you’ll create a beautiful, reflective feature that enhances your space.
Choosing the Right Mirrors
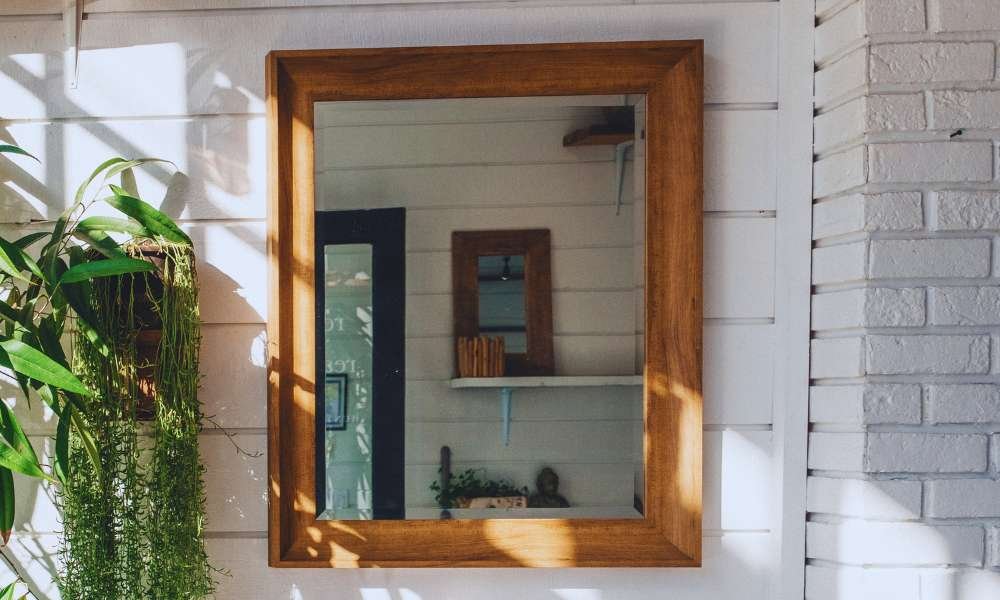
When learning how to make a mirror wall, choosing the right reflectors is crucial for achieving the desired look. There are various types of mirrors to consider, such as frameless, framed, and beveled. Frameless reflectors offer a sleek, modern appearance, while framed mirrors can add a decorative touch. Beveled mirrors provide an elegant, polished edge. Selecting the appropriate size and shape is essential to fit your space and design vision. Consider the quality and thickness of the mirrors as well; high-quality, thicker reflectors ensure durability and a clearer reflection. By carefully choosing the right mirrors, you’ll create a stunning mirror wall that enhances your room’s aesthetic and maximizes light reflection.
Preparing the Wall

Before starting your mirror wall project, it’s crucial to prepare the wall properly. Begin by thoroughly cleaning and smoothing the partition surface to ensure a strong adhesive bond. Remove any dirt, dust, or grease using a mild detergent and a clean cloth. Next, inspect the wall for any holes or imperfections. Patch holes with spackling paste and sand the area smooth once it’s dry. This step is essential for creating a flat, even surface for the reflectors. If the partition has significant imperfections or an uneven texture, consider applying a primer or base coat. This will create a smooth, uniform surface, ensuring the mirrors adhere properly and look flawless. Proper wall preparation sets the foundation for a beautiful and durable mirror partition.
Gathering Materials and Tools
When learning how to make a mirror wall, gathering the right materials and tools is essential. Start with a list of required materials: mirrors, strong adhesive, and mounting hardware. Opt for high-quality adhesive to ensure the reflectors stay in place. You’ll also need necessary tools like a level, measuring tape, and drill for precise placement and secure installation. Don’t forget safety equipment: gloves to protect your hands and safety glasses to shield your eyes during the process. Having all materials and tools ready before starting will streamline your project and prevent interruptions. Proper preparation not only ensures a smooth installation but also enhances the durability and appearance of your stunning reflector wall.
Marking the Wall for Mirror Placement

Marking the wall for mirror placement is a crucial step in creating a mirror partition. Begin by using a pencil and a level to create a precise layout on the partition. This ensures that each looking glass is placed accurately and aligned properly. Start by marking the top and bottom edges where the reflectors will go, and then outline the sides. Next, measure the dimensions of each looking glass and mark their positions on the wall, ensuring equal spacing between them. Double-check all measurements and alignments to avoid any mistakes. Accurate marking will help in achieving a seamless and professional-looking mirror partition that enhances your space. Proper preparation and precise marking are key to a successful looking glass wall installation.
Installing the Mirrors
When installing mirrors for your looking glass wall, start by applying a high-quality adhesive or mounting tape to the back of each mirror. Ensure the adhesive is evenly spread to provide a stronghold. Next, carefully position the reflectors on the partition according to your pre-planned layout. It’s essential to align each looking glass accurately to maintain a cohesive look. Press the mirrors firmly against the wall to secure them in place. For additional stability, especially with larger reflectors, use brackets or screws as needed. This step will help ensure that the mirrors stay securely attached and align perfectly. By following these steps, you’ll create a seamless and polished mirror wall that enhances your space.
Finishing Touches and Adjustments
Once your mirror wall is installed, it’s time for the finishing touches and adjustments. First, carefully inspect the partition for any gaps between mirrors or uneven edges. Adjust the positioning as needed to ensure a seamless and professional look. Next, clean the mirrors thoroughly to remove any fingerprints, adhesive residue, or dust. Use a glass cleaner and a soft cloth for a streak-free finish. If desired, enhance the appearance by adding decorative elements such as frames or trim around the reflectors. This final step adds a personalized touch and can complement your existing decor. By focusing on these details, your looking glass wall will achieve a polished and elegant finish, making it a stunning feature in your home.
Maintaining Your Mirror Wall
Maintaining your mirror wall is essential for keeping it looking pristine and stylish. To keep your reflectors clean and streak-free, use a non-abrasive glass cleaner and a microfiber cloth. Regularly inspect the partition to ensure mirrors are securely attached and check for any damage or looseness. Address any issues promptly to avoid further problems. Common issues like warping or discoloration can be minimized by avoiding excessive moisture and harsh cleaning agents. If warping or discoloration occurs, consult a professional to assess and resolve the issue. By following these maintenance tips, you’ll ensure your looking glass wall remains a stunning focal point in your home for years to come.
Conclusion
In conclusion, creating a mirror wall is a transformative project that can elevate the look and feel of any space. By carefully planning the layout, selecting the right reflectors, and following precise installation steps, you can achieve a stunning and functional addition to your home. Maintaining your mirror partition with regular cleaning and inspections ensures it remains a focal point of beauty and elegance. Whether you’re aiming to add a touch of sophistication or create the illusion of a larger room, a well-executed mirror wall offers both aesthetic appeal and practical benefits. Embrace the reflective charm of a reflector’s wall and enjoy the enhanced brightness and depth it brings to your living environment.
FAQs for How to Make a Mirror Wall
What type of mirrors should I use for a mirror wall?
– Use high-quality, frameless mirrors for a sleek look, or framed mirrors for a decorative touch. Ensure they are suitable for wall mounting.
How do I measure for a mirror wall?
– Measure the total wall space and plan your layout. Account for any gaps or borders to ensure a perfect fit.
What adhesive should I use to mount the mirrors?
– Use a strong, mirror-safe adhesive or mounting tape specifically designed for mirrors to ensure they stay securely attached.
How can I prevent my mirrors from warping?
– Avoid excessive moisture and heat exposure. Ensure proper installation and use of high-quality mirrors to minimize warping risks.
How do I clean my mirror wall without streaks?
– Use a non-abrasive glass cleaner and a microfiber cloth, wiping in a circular motion to prevent streaks and maintain a clear reflection.