Mirrors are essential elements in interior design, adding depth, light, and style to any room. Whether you’re looking to create the illusion of more space or simply enhance your decor, learning how to put a mirror on the wall can transform your living area. This guide will walk you through the process, ensuring you achieve a secure and aesthetically pleasing result. From selecting the perfect mirror to gathering the necessary tools and executing the installation, we cover everything you need to know. With our step-by-step instructions, even beginners can confidently tackle this home improvement project. Get ready to boost your room’s appeal and functionality with a well-placed mirror that reflects your personal style. Read on to discover the best practices for hanging a mirror on the wall and start your journey toward a more vibrant and spacious home.
Choosing the Right Mirror
When learning how to put a mirror on the wall, choosing the right reflector is crucial. First, consider the size and shape. A large mirror can make a small room appear more spacious, while a uniquely shaped mirror can serve as a striking focal point. Ensure the reflector fits the wall space without overwhelming the area. Next, match the mirror with your room’s decor. For a modern look, opt for sleek, frameless designs. Traditional spaces might benefit from ornate, framed mirrors. Reflect on the room’s color scheme and style to select a mirror that enhances the overall aesthetic. By thoughtfully considering size, shape, and decor, you’ll choose a reflector that not only fits perfectly but also elevates the room’s ambiance. This careful selection is a key step in successfully hanging a mirror on the wall.
Selecting the Perfect Location
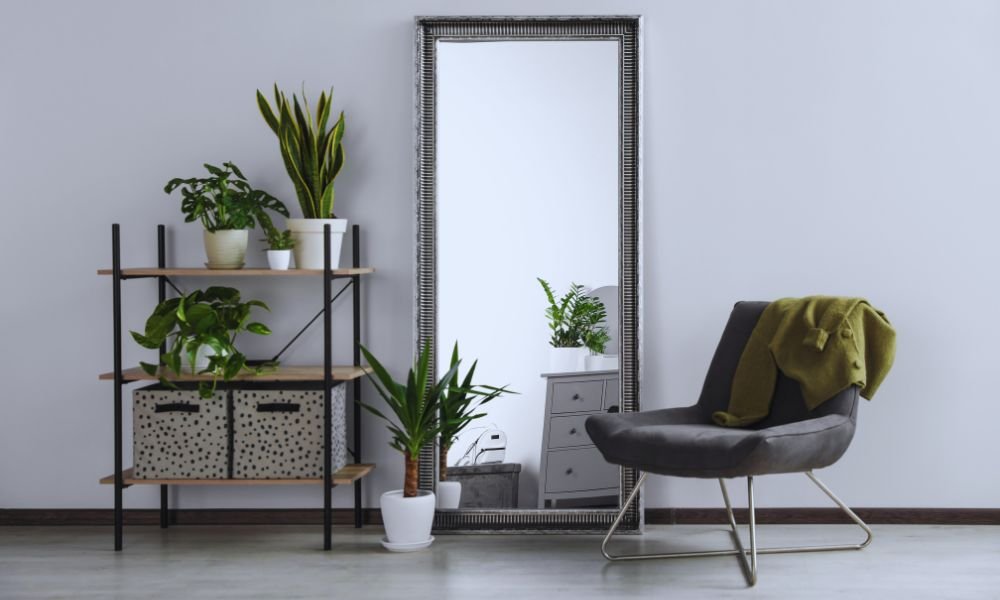
When learning how to put a mirror on the wall, selecting the perfect location is crucial. Start by finding the ideal spot that enhances the room’s aesthetics and functionality. Consider the height; placing the reflector at eye level ensures maximum usability. Assess the lighting; a well-placed mirror can reflect natural or artificial light, brightening the space. Pay attention to reflections; the mirror should capture attractive elements of the room, such as artwork or windows, and avoid reflecting clutter. By thoughtfully choosing the location, you can create a focal point that enhances your room’s ambiance and visual appeal. Proper placement not only improves the room’s aesthetics but also maximizes the mirror’s practical benefits, making your space feel larger and more inviting.
Gathering Necessary Tools and Materials
To ensure a smooth process of learning how to put a mirror on the wall, gathering the necessary tools and materials is crucial. You’ll need a tape measure, level, drill, screws, and anchors. These basic tools help measure accurately, ensure the reflector is level, and secure it firmly to the wall. Additionally, don’t forget safety equipment: gloves to protect your hands, goggles to shield your eyes from dust and debris, and assistance to help hold the mirror in place during installation. Proper preparation with the right tools and safety gear not only makes the job easier but also ensures a secure and professional-looking result. By having everything ready beforehand, you can avoid interruptions and complete the reflector installation efficiently and safely.
Preparing the Wall

Preparing the wall is a crucial step when learning how to put a mirror on the wall. First, identify your wall type—drywall, plaster, or brick—as this affects the tools and anchors you’ll need. Check for any obstructions, such as nails or screws, and remove them to ensure a smooth surface. Clean the wall thoroughly, removing dust and debris, to allow for better adhesion and secure mounting. By properly preparing the wall, you’ll create a stable foundation for your reflector, ensuring it stays in place and looks great. Taking these steps not only enhances safety but also helps achieve a professional finish, making your room more visually appealing. Follow these guidelines to set the stage for a successful mirror installation and elevate your home’s decor effortlessly.
Marking the Placement
Marking the placement is a crucial step in learning how to put a mirror on the wall. Begin by measuring the mirror’s dimensions and the desired height on the wall. Use a pencil to mark the top edge of the reflector, ensuring it’s centered and positioned correctly. Next, measure the distance between the hanging brackets or holes on the back of the mirror and transfer these measurements to the wall. This step ensures the brackets align perfectly. To achieve precision, use a level to draw horizontal lines through the marks, guaranteeing the reflector will hang straight. Double-check all measurements and marks before proceeding. Accurate marking ensures a secure and aesthetically pleasing installation, making your mirror a beautiful addition to your space.
Installing Wall Anchors

Installing wall anchors is crucial for securely mounting a mirror on your wall. Start by choosing the appropriate type of anchor based on your wall material—drywall, plaster, or brick. For drywall, use plastic or toggle anchors; for brick or concrete, opt for masonry anchors. Next, measure and mark the spot where the anchor will go. Drill holes to the required depth, ensuring they are level and aligned. Insert the anchors carefully, tapping them in if needed. These anchors provide the necessary support and stability for hanging your reflector, preventing it from falling or shifting. Properly installed wall anchors ensure a secure and lasting mount, making your mirror both functional and decorative.
Mounting the Mirror
Mounting the mirror correctly is crucial for both stability and aesthetics. Start by attaching the appropriate mounting brackets or hooks to the back of the reflector. Ensure these are evenly spaced and aligned to support the weight of the mirror. Next, secure the mirror onto the wall mounts, carefully aligning it with the pre-installed anchors. Gently press the mirror against the wall to ensure the brackets or hooks fit snugly into place. Use a level to check that the reflector is perfectly straight, making adjustments as needed. This step is essential for a professional-looking finish and to prevent the mirror from shifting over time. Proper mounting not only enhances the mirror’s appearance but also ensures safety and durability. Follow these guidelines to achieve a secure and visually appealing installation.
Final Adjustments
Once your mirror is mounted, it’s crucial to make final adjustments to ensure a flawless finish. Start by checking the mirror’s level and alignment using a level tool. This step ensures that your reflector is perfectly straight and positioned correctly on the wall. If the mirror appears uneven, carefully adjust the mounting brackets or hooks to correct the alignment. Next, check for stability by gently pressing on the reflector to ensure it’s securely attached. If necessary, tighten screws or adjust anchors to enhance stability. These final touches will help maintain the mirror’s position and prevent any potential accidents. Properly executed final adjustments not only enhance the mirror’s appearance but also ensure its long-term functionality. Follow these steps to achieve a professional and polished look for your wall-mounted mirror.
Safety Tips and Maintenance
Ensuring the safety and longevity of your wall mirror involves routine checks and proper maintenance. Start by regularly inspecting the mirror to confirm it’s securely mounted. Look for any signs of loosening or damage, and address issues promptly to avoid accidents. For cleaning, use a soft cloth and a mild glass cleaner to prevent streaks and scratches. Avoid abrasive materials and harsh chemicals that can damage the mirror’s surface. Additionally, periodically wipe down the area around the reflector to prevent dust buildup and maintain its overall appearance. By following these safety tips and maintenance practices, you can keep your mirror looking pristine and securely in place for years to come.
Conclusion
In conclusion, mastering how to put a mirror on a wall not only enhances the aesthetic appeal of your space but also adds a functional element to your decor. By following these detailed steps—choosing the right reflector, selecting the perfect location, and ensuring secure installation—you can achieve a flawless result that complements your interior design. Proper preparation and the correct tools are crucial for a successful installation, ensuring that your mirror remains both attractive and stable over time. Whether you’re upgrading your living room or adding a stylish touch to a hallway, understanding how to put a mirror on a wall allows you to create a visually appealing and practical addition to your home. Enjoy the new look and functionality your mirror brings to your space.
FAQs on How to Put a Mirror on a Wall
What tools do I need to install a mirror on the wall?
To install a mirror, you’ll need a tape measure, level, drill, screws, wall anchors, a pencil for marking, and mounting brackets or hooks. Safety gear like gloves and goggles is also recommended.
How do I choose the right location for my mirror?
Select a location that complements your room’s layout and decor. Consider the height for optimal reflection and lighting to highlight the mirror. Avoid areas with frequent foot traffic to prevent accidental damage.
How do I ensure the mirror is securely mounted?
Use wall anchors appropriate for your wall type to provide extra support. Make sure the mounting brackets or hooks are firmly attached and check the mirror’s alignment with a level before finalizing the installation.
Can I install a large mirror on drywall?
Yes, but it’s essential to use heavy-duty wall anchors and screws. For very large mirrors, consider using wall studs for extra support or consult a professional for installation.
How do I clean and maintain my wall-mounted mirror?
Regularly clean the mirror with a glass cleaner and a soft cloth. Avoid abrasive materials that can scratch the surface. Check the mirror’s mounting periodically to ensure it remains secure.