Removing a mirror from a wall might seem daunting, but with the right technique, it’s a conceivable DIY task. Whether you’re updating your space or virtually changing a replicate, knowing how to do it effectively can save time and prevent damage. In this guide, we’ll walk you through the step-by-step process of how to remove a mirror from a wall, masking the whole lot from important tools to defensive measures. Follow along to make sure your venture is easy, damage-free, and stress-free while keeping your home in pinnacle shape.
Tools and Materials You Will Need
To competently remove a mirror from a wall, having the proper gear and substances is critical. You’ll want a few fundamental items: defensive gloves to protect your fingers, a pry bar for loosening the mirror, and painter’s tape to secure glass pieces if they shatter. A heat gun or hair dryer allows you to melt adhesive for glued mirrors.
Other useful equipment includes a screwdriver, drop cloth, and application knife. Many of these gear may be discovered at neighborhood hardware stores or online retailers like Amazon, making instructions clean and green for this DIY assignment.
Step 1: Assess the Mirror Type and Mounting Method
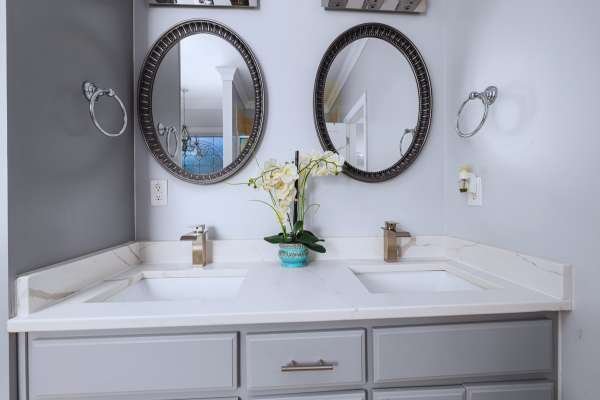
Before getting rid of a replicate, it’s crucial to evaluate the way it’s installed. Mirrors are usually secured in 3 methods: glued, clipped, or screwed. A glued reflection can be flush towards the wall, without using visible hardware. Mirrors with clips have small brackets around the rims, conserving them in the region.
Screwed mirrors regularly have visible screws on the corners or facets. To become aware of which sort you are managing, investigate the reflection intently and run your hand around the edges. Knowing the mounting technique allows for determining the most secure and simplest removal method.
Step 2: Protect the Surrounding Area
Before you begin the process of disposing of a replicate from a wall, it’s crucial to protect the surrounding place. Start by protecting the floor with a drop cloth or vintage blankets to seize any particles or glass shards. Move any close by furnishings far from the wall to avoid unintended harm. Additionally, don’t forget the use of painter’s tape around the edges of the replicate.
This no longer only protects the wall from scratches but also facilitates creating a clean part for any capacity contact-U.S. after the reflect is eliminated. Taking those precautions will make the elimination procedure smoother and more secure.
Step 3: Remove or Loosen Clips (If Applicable)
If your mirror is secured with clips, brackets, or anchors, start by locating these fasteners. Use a screwdriver to carefully unscrew any visible screws, ensuring you support the reflection to prevent it from falling. If the clips are tight, gently loosen them with a flathead screwdriver, being cautious not to apply excessive force.
Always wear gloves to protect your hands from sharp edges and ensure your workspace is clear. If the mirror feels unstable, enlist a friend to hold it while you remove the clips, ensuring a safe and smooth process.
Step 4: Safely Detach a Glued Mirror

To safely detach a glued mirror, start by gently heating the adhesive around the edges. Use a heat gun or hair dryer on a low setting to soften the glue. This makes it easier to remove the mirror without cracking it.
Once the adhesive is warm, carefully insert a pry bar or a flat tool between the reflection and the wall, applying gentle pressure. If you encounter stubborn spots, reheat the area and try again. Always work slowly to avoid damage. With patience, you can successfully remove the mirror while keeping both the glass and wall intact.
Step 5: Handle the Mirror with Care
When it’s time to handle the mirror, prioritize safety and care. For large mirrors, enlist a friend to help with lifting and carrying to prevent accidents. Always hold the reflection by its edges, avoiding pressure on the glass to minimize the risk of breakage. If you plan to store or dispose of the mirror, wrap it in moving blankets or bubble wrap for protection.
Secure it with tape, ensuring it remains cushioned during transport. Following these tips will help you manage the mirror safely and effectively, keeping both you and the glass intact.
Step 6: Clean and Inspect the Wall
Once you’ve successfully removed the mirror, it’s time to clean and inspect the wall. Start by using a mild adhesive remover or a mixture of warm soapy water to gently scrub away any residue left behind. A soft cloth or sponge works best to avoid damaging the paint. After cleaning, check for any wall imperfections, such as holes or scratches. If needed, fill in these spots with a spackle or wall repair compound. Finally, touch up the area with matching paint for a seamless finish, ensuring your wall looks pristine and ready for its next decor.
Safety Tips Throughout the Process
When tackling the assignment of doing away with a mirror from a wall, safety must constantly come first. Start by carrying shielding gloves to shield your arms from sharp edges and glass shards. Ensure the vicinity is clear of kids and pets to prevent accidents at some stage in the method.
It’s clever to paint with a partner when dealing with large mirrors, as this reduces the chance of drops and injury. Additionally, use a sturdy ladder if wished, and take some time to keep away from dashing. Following those safety hints will help ensure a clean and secure reflect removal.
Conclusion
In conclusion, knowing how to remove a mirror from a wall can empower you to refresh your space safely and efficiently. By following the outlined steps, from assessing the mirror type to ensuring proper safety measures, you can tackle this DIY project with confidence.
Whether you’re redecorating or simply replacing an old mirror, taking the time to do it right will prevent damage and make the process enjoyable. Now you’re ready to get started and transform your wall effortlessly!