
Removing a mirror glued to a wall can be a daunting task, but with the right approach, it can be done safely and effectively. In this guide on how to remove a mirror glued to a wall, we will walk you through each step, ensuring you have the tools and knowledge needed for a smooth removal process. Whether you’re updating your decor or replacing a damaged mirror, our expert tips will help you avoid common pitfalls and protect your walls from damage. From preparing your workspace to handling the mirror safely, we cover everything you need to know. Follow our detailed instructions to achieve professional results without unnecessary stress. Read on to discover the best methods for removing a glued mirror, ensuring a clean and damage-free finish.
Gather Necessary Tools and Materials
Before you start removing a mirror glued to the wall, gathering the necessary tools and materials is essential. Ensure you have a utility knife, heavy-duty gloves, a heat gun or hair dryer, wire or guitar string, a pry bar, and drop cloths. These tools will help you cut through the adhesive and protect your surfaces. Additionally, prioritize safety by wearing goggles and protective clothing to shield yourself from potential hazards. Heavy-duty gloves will protect your hands, while goggles will safeguard your eyes from debris. Using a heat gun or hair dryer will soften the adhesive, making it easier to work with the utility knife and wire. Drop cloths will keep your floors and surrounding areas clean and undamaged. Proper preparation with the right tools and safety gear is crucial for a successful mirror removal.
Prepare the Work Area
When learning how to remove a mirror glued to a wall, preparing the work area is crucial for safety and efficiency. Start by clearing the area around the looking glass to ensure ample workspace and prevent accidents. Remove any furniture, decorations, or obstacles that could interfere with the process. Next, lay down drop cloths to protect the flooring and nearby surfaces from potential damage. Drop cloths will catch any falling debris, adhesive residue, or mirror fragments, making cleanup easier and safeguarding your home. Ensuring a clean and organized work area will not only streamline the looking glass removal process but also help you avoid unnecessary damage and maintain a safe environment. Proper preparation is key to a successful and smooth mirror removal experience.
Assess the Mirror Installation
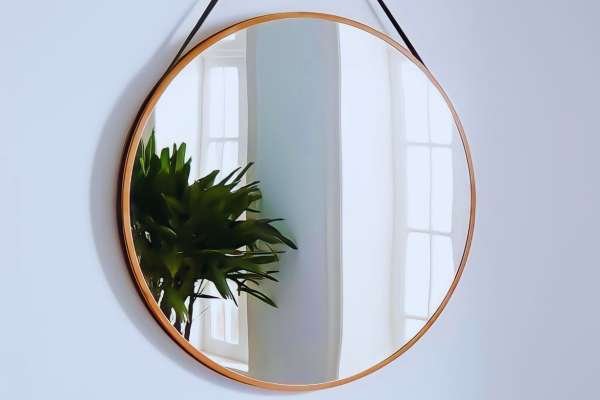
Assessing the mirror installation is a crucial first step when learning how to remove a mirror glued to a wall. Begin by carefully inspecting the edges of the looking glass for any gaps or visible signs of adhesive. These indicators can help you understand how firmly the mirror is attached and where to start the removal process. Additionally, check if the looking glass is secured with brackets, as these will need to be removed before tackling the adhesive. Identifying the mounting method ensures you approach the removal process with the right tools and techniques, minimizing the risk of damage to both the mirror and the partition. Proper assessment is key to a successful and safe-looking glass removal.
Heat the Adhesive
To remove a mirror glued to a wall, start by heating the adhesive. Use a heat gun or hair dryer to soften the glue. This step is crucial for loosening the adhesive’s grip on the partition. Hold the heat source about 6-8 inches away from the looking glass and move it in a slow, even motion around the edges. Make sure to heat all sides of the mirror evenly, ensuring the adhesive softens uniformly. This process will make it easier to insert a tool and cut through the glue without damaging the wall or the looking glass. Be patient and thorough, as evenly heating the adhesive is key to a smooth and successful mirror removal.
Cut Through the Adhesive
Cutting through the adhesive is a crucial step in the process of removing a mirror glued to a wall. Start by carefully inserting a utility knife between the looking glass and the wall. This initial cut is essential to create space for the next tool. Gently slice through the adhesive, ensuring you apply even pressure to avoid damaging the wall or mirror. By creating enough space, you can easily insert a wire or string to continue the removal process. The wire or string will help in separating the looking glass from the partition without causing cracks or breakage. This method ensures a clean and efficient removal, protecting both the mirror and the wall from unnecessary damage.
Use a Wire or Guitar String
Removing a mirror glued to a wall can be tricky, but using a wire or guitar string is an effective method. To start, carefully slide the wire or string behind the looking glass. Once it’s in place, use a gentle sawing motion to cut through the adhesive. Begin at the top and work your way down, ensuring steady pressure to avoid damaging the wall or mirror. This technique helps to evenly separate the looking glass from the adhesive, making it easier to detach. Always wear heavy-duty gloves and protective eyewear for safety. With patience and the right technique, using a wire or guitar string can simplify the process of removing a glued mirror, ensuring a smooth and damage-free removal.
Pry the Mirror from the Wall

When tackling the task of how to remove a mirror glued to a wall, prying the looking glass carefully is crucial. Start by gently inserting a pry bar behind the mirror. Ensure the tool is positioned correctly to avoid cracking or breaking the glass. Apply even pressure to gradually separate the looking glass from the partition, working your way around the edges. This slow and steady approach helps prevent damage to both the mirror and the wall. By maintaining consistent pressure, you can safely detach the looking glass without sudden jolts that might cause harm. Patience is key; rushing can lead to costly mistakes. Follow these steps to effectively and safely pry the mirror from the wall, ensuring a smooth removal process.
Handle the Mirror Safely
Once you’ve successfully detached the mirror from the wall, the next crucial step is handling it safely. Carefully lift the looking glass away from the wall to prevent any accidental breakage or damage. It’s important to maintain a steady grip and support the mirror from its edges to avoid putting pressure on its fragile center. Place the looking glass in a secure location where it won’t be knocked over or bumped into. Taking these precautions ensures that your mirror remains intact throughout the removal process, allowing you to complete the task smoothly and without any mishaps.
Clean Up and Inspect the Wall
After safely removing the glued mirror, it’s crucial to clean up and inspect the wall thoroughly. Use a scraper or adhesive remover to eliminate any residual adhesive left on the surface. Once cleaned, carefully examine the wall for any signs of damage caused during the removal process. Address any cracks, holes, or imperfections promptly to restore the wall to its original condition. This final step ensures that your wall remains intact and ready for any further decorating or renovations. Taking the time to clean up and inspect the wall ensures a smooth finish and prevents future issues with your wall’s integrity.
Conclusion
In conclusion, safely removing a glued mirror from a wall involves several key steps. Start by gathering the necessary tools such as a heat gun or hair dryer, utility knife, and protective gear. Heat the adhesive to loosen it, then carefully cut through with a wire or guitar string. Use a pry bar to gently separate the looking glass from the wall, ensuring even pressure to avoid damage. Once removed, handle the mirror with care to prevent breakage. Finally, clean any remaining adhesive from the wall using a scraper or adhesive remover and inspect for damage that may require repair. Following these steps will help you successfully remove a glued mirror while protecting your walls and achieving a smooth, safe process.
FAQ For How to Remove Mirror Glued to Wall
How do I safely heat the adhesive behind the mirror?
Use a heat gun or hair dryer to evenly heat the edges of the mirror, softening the adhesive for easier removal.
What tools do I need to remove a glued mirror?
Essential tools include a utility knife, heavy-duty gloves, a pry bar, and optionally, a wire or guitar string for cutting through the adhesive.
How can I prevent damaging the wall during removal?
Apply even pressure when using a pry bar to avoid putting stress on the wall. Also, ensure the area is clear of obstacles.
What should I do with the mirror once it’s removed?
Handle it carefully to prevent breakage. Place it in a safe location away from traffic until it can be properly disposed of or reused.
How do I clean adhesive residue from the wall?
Use a scraper or adhesive remover to gently remove any remaining adhesive, taking care not to damage the wall surface.